
Dealer Price Quote For Replacement Vanagon Bumpers & Trim
It will cost you more than $4000 to replace all of the fiberglass
bumpers, panels, and related hardware, if still available. This is
greater than most Vanagon's Blue Book Value. It is definitely more
economical to repair, remove and replace the bumpers with a metal bumper
alternative, or cover the panels and bumpers with an alternate material
like truck bed liner paint.


Cracked And Oxidized Fiberglass Vanagon Panels
Have your Vanagon's fiberglass bumpers and side panels seen better days? I was tired of my front bumpers numerous cracks and fissures. The gray paint on all the panels was oxidized and faded. The only way to make them look good was to apply tire grease. I tried to find some used parts online and through Craigslist, but the chances of purchasing a perfect set where all the panels paint matched was not to be found. Taking them into a boat or paint shop for repair was too expensive.
Replacing all Vanagon panels and bumpers with new parts from Volkswagen will cost you more than $4000 (if still available). The only solution to cover up the blemishes, add a different visual look, and provide a little durability to the Vanagon's panels was to use truck bed liner paint.

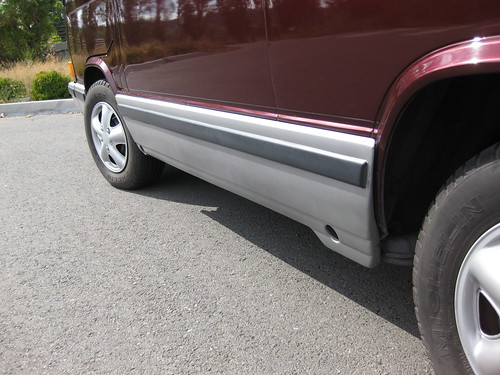

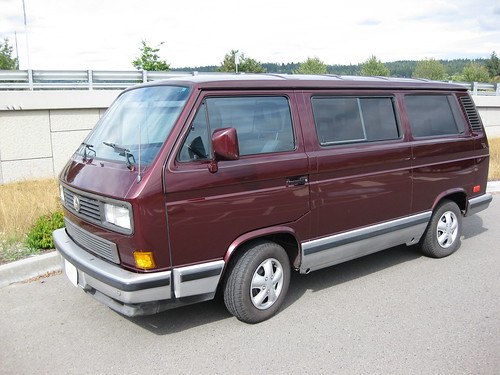
Replacing all Vanagon panels and bumpers with new parts from Volkswagen will cost you more than $4000 (if still available). The only solution to cover up the blemishes, add a different visual look, and provide a little durability to the Vanagon's panels was to use truck bed liner paint.


Applying Herculiner To A Vanagon's Bumpers And Trim Panels
To cover up all those fissures, faded gray paint, and small cracks, I chose to apply truck bed liner paint to all the panels. The product I selected was Herculiner , the 1 Gallon Kit which includes the rollers. It was a cost effective solution to cosmetically fix the Vanagon's bumpers and fiberglass trim panels. The front radiator panel up to the bottom of the headlight grill was also done in Herculiner
 . This created a blacked out bra-like look without the hassle of trapping grit and grime under the fabric. The bed liner also acts as a rock and chip guard, and covered up some small rust spots.
Supplies Needed:
Recommendations:
Other Popular Truck Bed Liner Options:
Hippo Liner
Raptor Spray On Liner
Dupli-Color


Supplies Needed:
- Two 1-Gallon cans of Herculiner
(other bed liner paints may vary)
- Herculiner UV Topcoat Protectant
(apply when bed liner is cured)
- At least 6 rollers total.
- Painters tape.
- Rubber/silicone gloves.
- Acetone for cleaning.
- A few kitchen scouring pads for paint and panel preparation.
Recommendations:
- Be sure to spend some time masking off properly, I didn't in some areas, and it shows (only close up)
- Use a drop cloth and gloves. I think I got more on the garage floor than the van.
- Don't use too much bed liner on the roller, it will drip and sag. (see last photo)
- Do rough up all surface areas (its hard step to take a scour pad to the paint and panels)
- Explore a spray on option if you desire a finer grain.
- Discard the rollers after each application.
- Keep extra rollers on hand in case you need a change in the middle of the application process. We used finer rollers which worked well.
- Apply the Herculiner UV Topcoat Protection
after bed liner has cured (This was out of stock when I applied my bed liner)
Other Popular Truck Bed Liner Options:
Hippo Liner
Raptor Spray On Liner
Dupli-Color


Vanagon Trim After Tuck Bed Liner
Here is are some photos of the Vanagon after all coats of bed liner were applied. I added a small strip on the drivers door to cover up some dings, and to provide future door guard protection.
The front grills were painted in flat black barbecue paint. My first impression of the newly painted trim panels and bumpers was I hated it. It seemed too glossy, and created an optical effect that there were bald spots in the bed liner paint as there were during the first coat of bed liner. Another grievance was it appeared too chunky. This is the norm for rolled on, manual applied bed liners.
This project took place this past summer. The trim and bumpers have eased up on their gloss and are more of a matte finish now. I am pleased with the outcome. The overall look of the van is different. All of the panels and bumpers took two coats. There was just enough in two 1 Gallon cans of Herculiner to complete the job.
The DIY method was much less expensive (under $200) than refinishing the panels, or taking them in to a commercial spray on bed liner shop like LineX or Rhino Liner. The next project will be using Herculiner on the inside metal panels which I previously used Peel And Seal for sound dampening.


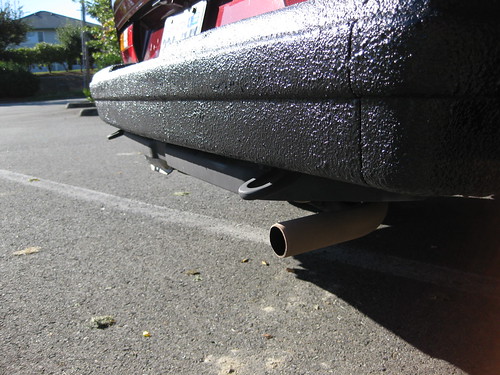
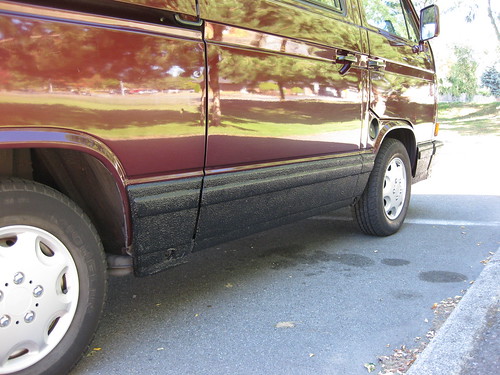
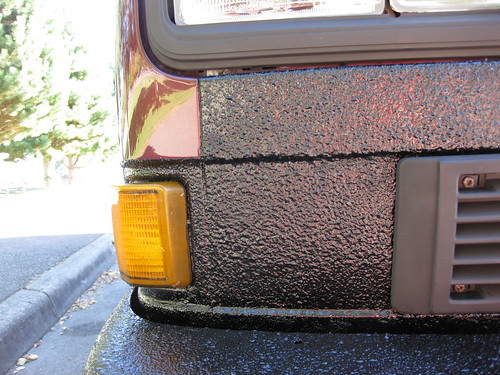
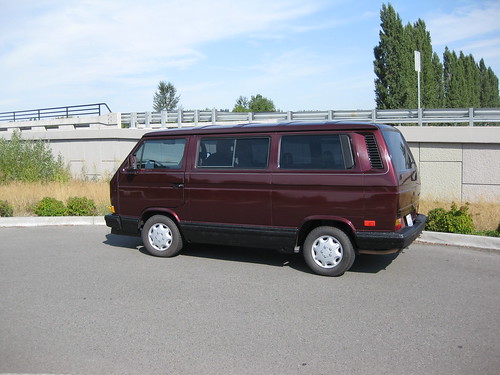
The front grills were painted in flat black barbecue paint. My first impression of the newly painted trim panels and bumpers was I hated it. It seemed too glossy, and created an optical effect that there were bald spots in the bed liner paint as there were during the first coat of bed liner. Another grievance was it appeared too chunky. This is the norm for rolled on, manual applied bed liners.
This project took place this past summer. The trim and bumpers have eased up on their gloss and are more of a matte finish now. I am pleased with the outcome. The overall look of the van is different. All of the panels and bumpers took two coats. There was just enough in two 1 Gallon cans of Herculiner
The DIY method was much less expensive (under $200) than refinishing the panels, or taking them in to a commercial spray on bed liner shop like LineX or Rhino Liner. The next project will be using Herculiner


Subscribe to:
Comments (Atom)

